Tiling costs
Tiling is one of the most functional and attractive ways to decorate a home, with many advantages – protecting walls and floors from water damage, being easy to clean, and available in a huge variety of colours and styles. With so many options though, working out pricing for tiling can be complicated. We’ve put together this guide to give you some idea of how much tiling can cost, looking at tile prices, as well as specific bathroom tiling costs, kitchen tiling costs, and floor tiling costs, so you’ll know what to expect before you start your project.
Tiling costs per square meter
One of the simplest ways to break down the cost of a tiling project is to work out the cost based on the size of the area being tiled. On small projects, you can take the area, say a bathroom wall, work out the size, and apply a rough cost based on that. The cost will be split between two main elements – the price of the tiles themselves, and the labour involved in fitting them.
The cost of tiles varies widely depending on the style and material of tiling, with different types, such as ceramic tiles and porcelain tiles costing differing amounts. It is usually easiest to purchase tiles yourself for a job, and it is easy to shop around to find the style and price-point that suits you. Remember, it is a good idea to buy more than enough to cover the area you want tiled, to account for any damage or breakages during the tiling process – around 10% more is a good rule of thumb. Given all the varieties involved, it is hard to put a price on tiles themselves, but around £20 per square metre would be fairly typical for simple tiles.
When it comes to labour, the price will depend on the experience of the tiler, the size of the company and your location, with prices in London tending to be higher. Ultimately, rates per square metre can vary between £20 and £40 per square metre. However, tilers can also charge by the day rate if they’ll be there for more than six hours or so, which can come to between £150 and £200 per day.
There are also additional costs, of things such as grout and adhesives, which may come to £50 depending on the size of the job, and extra costs if the walls need preparing, with either plastering or removing old tiles needing to be carried out.
All tiling jobs will ultimately come down to the calculations above, with a very rough price of £50 per square metre, but we can break down some of the most common tiling jobs and point out any particular issues which might affect the overall cost.
Cost of wall tiling
The price of wall tiling can be worked out by the calculation above, assuming there are no significant issues such as the wall needing to be prepared.
Cost of floor tiling
Floor tiles can be more expensive than wall tiles as they need to be hard-wearing enough to take the weight of feet and furniture. The subfloor may also have to be prepared, which will add to the overall floor tiling price.
Cost of tiling a bathroom
One thing that can increase the cost of tiling a bathroom is if you choose to do mosaic tiling, using very small tiles, as this will be far more labour intensive and take longer to complete, so will increase the price accordingly. Similarly, if you have a sloped ceiling or other surface that makes tiling more complex, it will add to the full bathroom tiling price.
Cost of tiling a kitchen
Kitchen tiling can be fairly straightforward if you a tiling a backsplash behind a sink or a worktop, and a tiler may be able to quote an all in kitchen tiling price fairly simply.
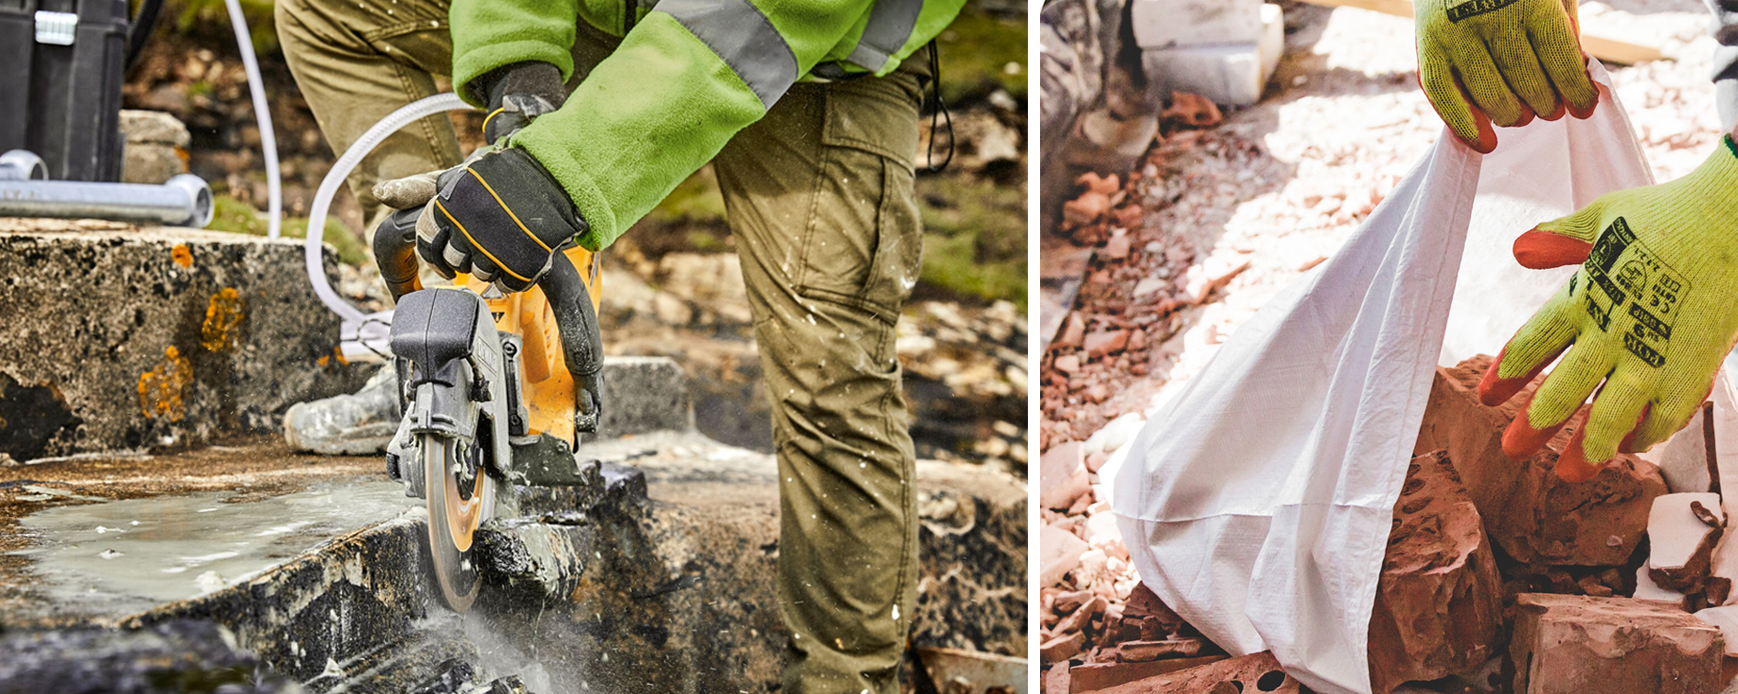
Which Tiling Tools Do I Need For My Project? A Checklist
Tackling a spot of DIY tiling? Make sure you’ve got all the tools you’ll need! Here’s a handy checklist of tiling tools for your everyday project…
Tiling Tools Checklist
Preparation
Pencil
Protective clothing – goggles and gloves
Dust sheet
Sponges and cloths
Spirit level
Stanley Knife
Tape measure
Step ladder (wall tiling)
Scraper
Fixing
Rubber mallet
Wooden baton (wall tiling)
Spacers
Trowel
Bucket
Tile cutter
Grouting + finishing
Grout float
Grout finisher
Dustpan and brush
Why do you need these tiling tools?
If you’ve got the time, let’s have a look at the functions of these tools in a little more detail…
- Pencil
You would be surprised how often you use the trusty pencil when you are tiling – making notes and measurements and marking starting points. Whilst you may always remember a pencil in your tool box – do you have a sharpener?
The one weakness with pencils is that they aren’t great for marking the top of a tile – which is great when they are laid, just not when you are laying them. For this we recommend either a china marker or a silver marker pen.
Chalk is also useful for marking lines across a floor – and providing your guide for laying your tiles.
- Protective clothing
You are going to get dirty! Wear hardwearing clothes that can withstand the work you will be doing. Protective goggles for when you are cutting, latex or nitrile gloves to protect your hands from any cement you will be working with – cement burns and injuries are a very real risk. - Dust sheets
Useful for protecting areas that are at risk of damage in the tiling area – bathtub, sinks etc. or even just to rest your bucket and tools on to protect the floor from getting dirty. - Sponges and cloths
To keep cleaning as you go – both surfaces and tools. It’s good practice to be in the habit of cleaning as you go and not letting any grouts or adhesives set. - Spirit level
Never assume that your walls and floors are straight. It’s a common mistake to start your corner tile in the corner of the area you are tiling, only to find yourself going off at a not-quite-so straight line. Measure and make sure. - Stanley knife
Cutting tape, opening bags, cutting silicon nozzles – don’t overlook the trusty Stanley knife. - Tape measure
For measuring gaps and m2 – this should be a staple of your toolbox. - Step ladder
Consider how high you will be tiling – always remember to stay safe.
Getting started
- Scraper
Use a scraper for scraping old paint and/or adhesive from walls and floors for when you are preparing your surface to tile on to. - 24oz Rubber Mallet
A rubber mallet will help when levelling tiles – a gentle knock with the mallet helps keep everything level. - Wooden baton (for wall tiling)
For support of tiles until the adhesive is set. Just a strip of straight wood that can be temporarily screwed to a wall. - Spacers
These little crosses provide a uniform gap between tiles that is impossible to achieve without. They come in a variety of sizes and the choice is down to you as to how wide you want the grouting to be. Your tiled floor is designed to last, and the humble spacer will give you the professional look at the joints and gaps. British standard minimum recommendations are 2mm for walls and 3mm for floors, you can use 1mm with rectified tiles – use this as a good rule of thumb. - Adhesive Spreader / Trowel
When sticking tiles to a surface it is important to make sure you have an even covering of adhesive to make sure that the eventual tiled area is smooth and flat.
Use a notched spreader to create a combed effect with the adhesive – this tells you that the consistency is correct (as the ridges will stay intact), shows you where you have spread and the grooves create airways which help the tile to stick to the floor as it aids with the suction between tile and surface.
Top tip – only spread enough adhesive to do a few tiles at a time. It sets quickly and you run the risk of the tiles not bonding to the surface.
- Tile Cutter
Unless your room is perfectly square, you are going to need a tile cutter. Cutting around edges and door frames is part and parcel of tiling. We recommend using some safety goggles, just in case, and using a set of Tile nippers to fine-tune any corners and awkward edges. When using nippers always remember to file down any rough or sharp edges with a tile file or polishing pads. Pads are available in various grits depending on the material being filed and the finish required. Always remember to stay safe
There are 3 different types of tile cutters:
Manual Tile Cutter for straight cuts in ceramic or porcelain tiles. Pros – Very quick, mess-free
Electric Wet Saw for straight or angled cuts in ceramic, porcelain, glass and natural stone (water is used to eliminate dust and keep the blade cool which minimises chipping). Motors are available in various wattages and most have a 45-degree mitring feature.
Angle Grinder with a diamond blade – small, affordable but very versatile
- Buckets
You will need a bucket for mixing grout in. Make sure the bucket is clean as you don’t want to discolour or affect your fresh grout in any way.
In addition to that, a bucket of clean water on hand for cleaning up any spills and excess adhesives/grouts is always handy as it’s a lot easier than cleaning up once it has all set.
A bucket trowel is a handy tool designed to get the last remnants out of a bucket and is also useful for lifting smaller tiles from the surface before they set – should you go wrong.
- Grout Float
The Grout Float is designed to make the grouting process as smooth as possible. Spread the grout into the gaps between the tiles (grout joints) with the float. Made of rubber so as to not scratch your newly tiled surface it is important to keep your Float clean to extend its life and protect your tiles (a hardened bit of grout can scratch a tile). - Grout finisher
Only really suitable for grout joints 2 mm or less. This handy little tool is used for getting into the hard-to-reach areas and then finishing off the grouting with a smooth finish. One end is the ‘blade’ which you can use to fill in any gaps in the Grout Joints. The other end is the ‘ball’ which is used for smoothing out a line in the grout for a professional finish. - Dustpan and brush
Clean up after yourself and dust down as you go – small bits of dust and grit can leave the tiled area uneven, so always ensure your area is as clean as possible. Then make sure you clean up after yourself to truly show off your finished project.
Top tip – a spare hand brush is great for cleaning out excess adhesive from the joints (even though you may need to give the tiles a quick wipe-over with a sponge when you do it)
* * *
Types of Trade
- Architectural services →
- Bathroom fitting →
- Bricklaying & Repointing →
- Carpentry & Joinery →
- Conservatories & Greenhouses →
- Damp Proofing →
- Demolition & Clearance →
- Driveways & Paving →
- Electrical →
- Extensions & Garden rooms →
- Fencing →
- Flooring →
- Gardening & Landscaping →
- Groundwork & Foundations →
- Guttering, Fascias & Soffits →
- Heating work →
- Insulation →
- Kitchen fitting →
- Locks & Security →
- Loft conversions →
- Painting & Decorating →
- Plastering & Rendering →
- Plumbing →
- Repurposing outbuildings →
- Restoration & Refurbishment →
- Roofing & Scaffolding →
- Stonemasonry →
- Tiling →
- Tree surgery →
- Window & Door fitting →
- Wood burners & Chimneys →
Contact HH&M
HH&M’s services
- Assembling things →
- Building & Maintenance →
- Decorating & Painting →
- Gardening & Groundworks →
- Moving things →
Get a free quote
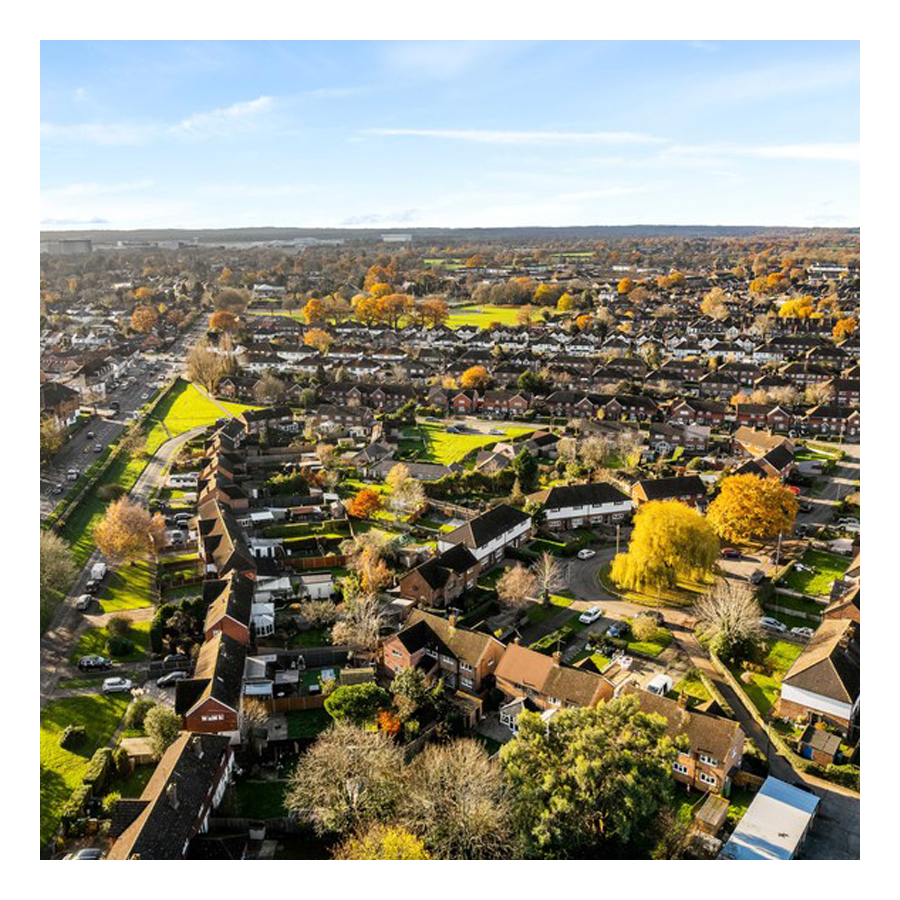
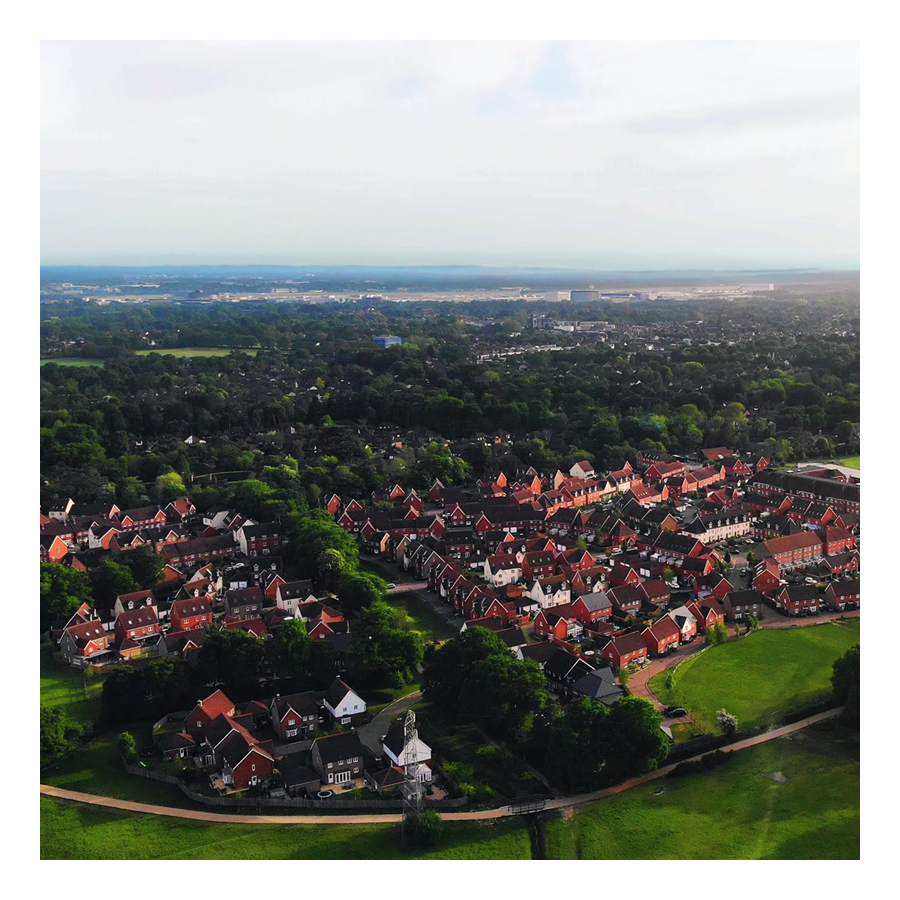
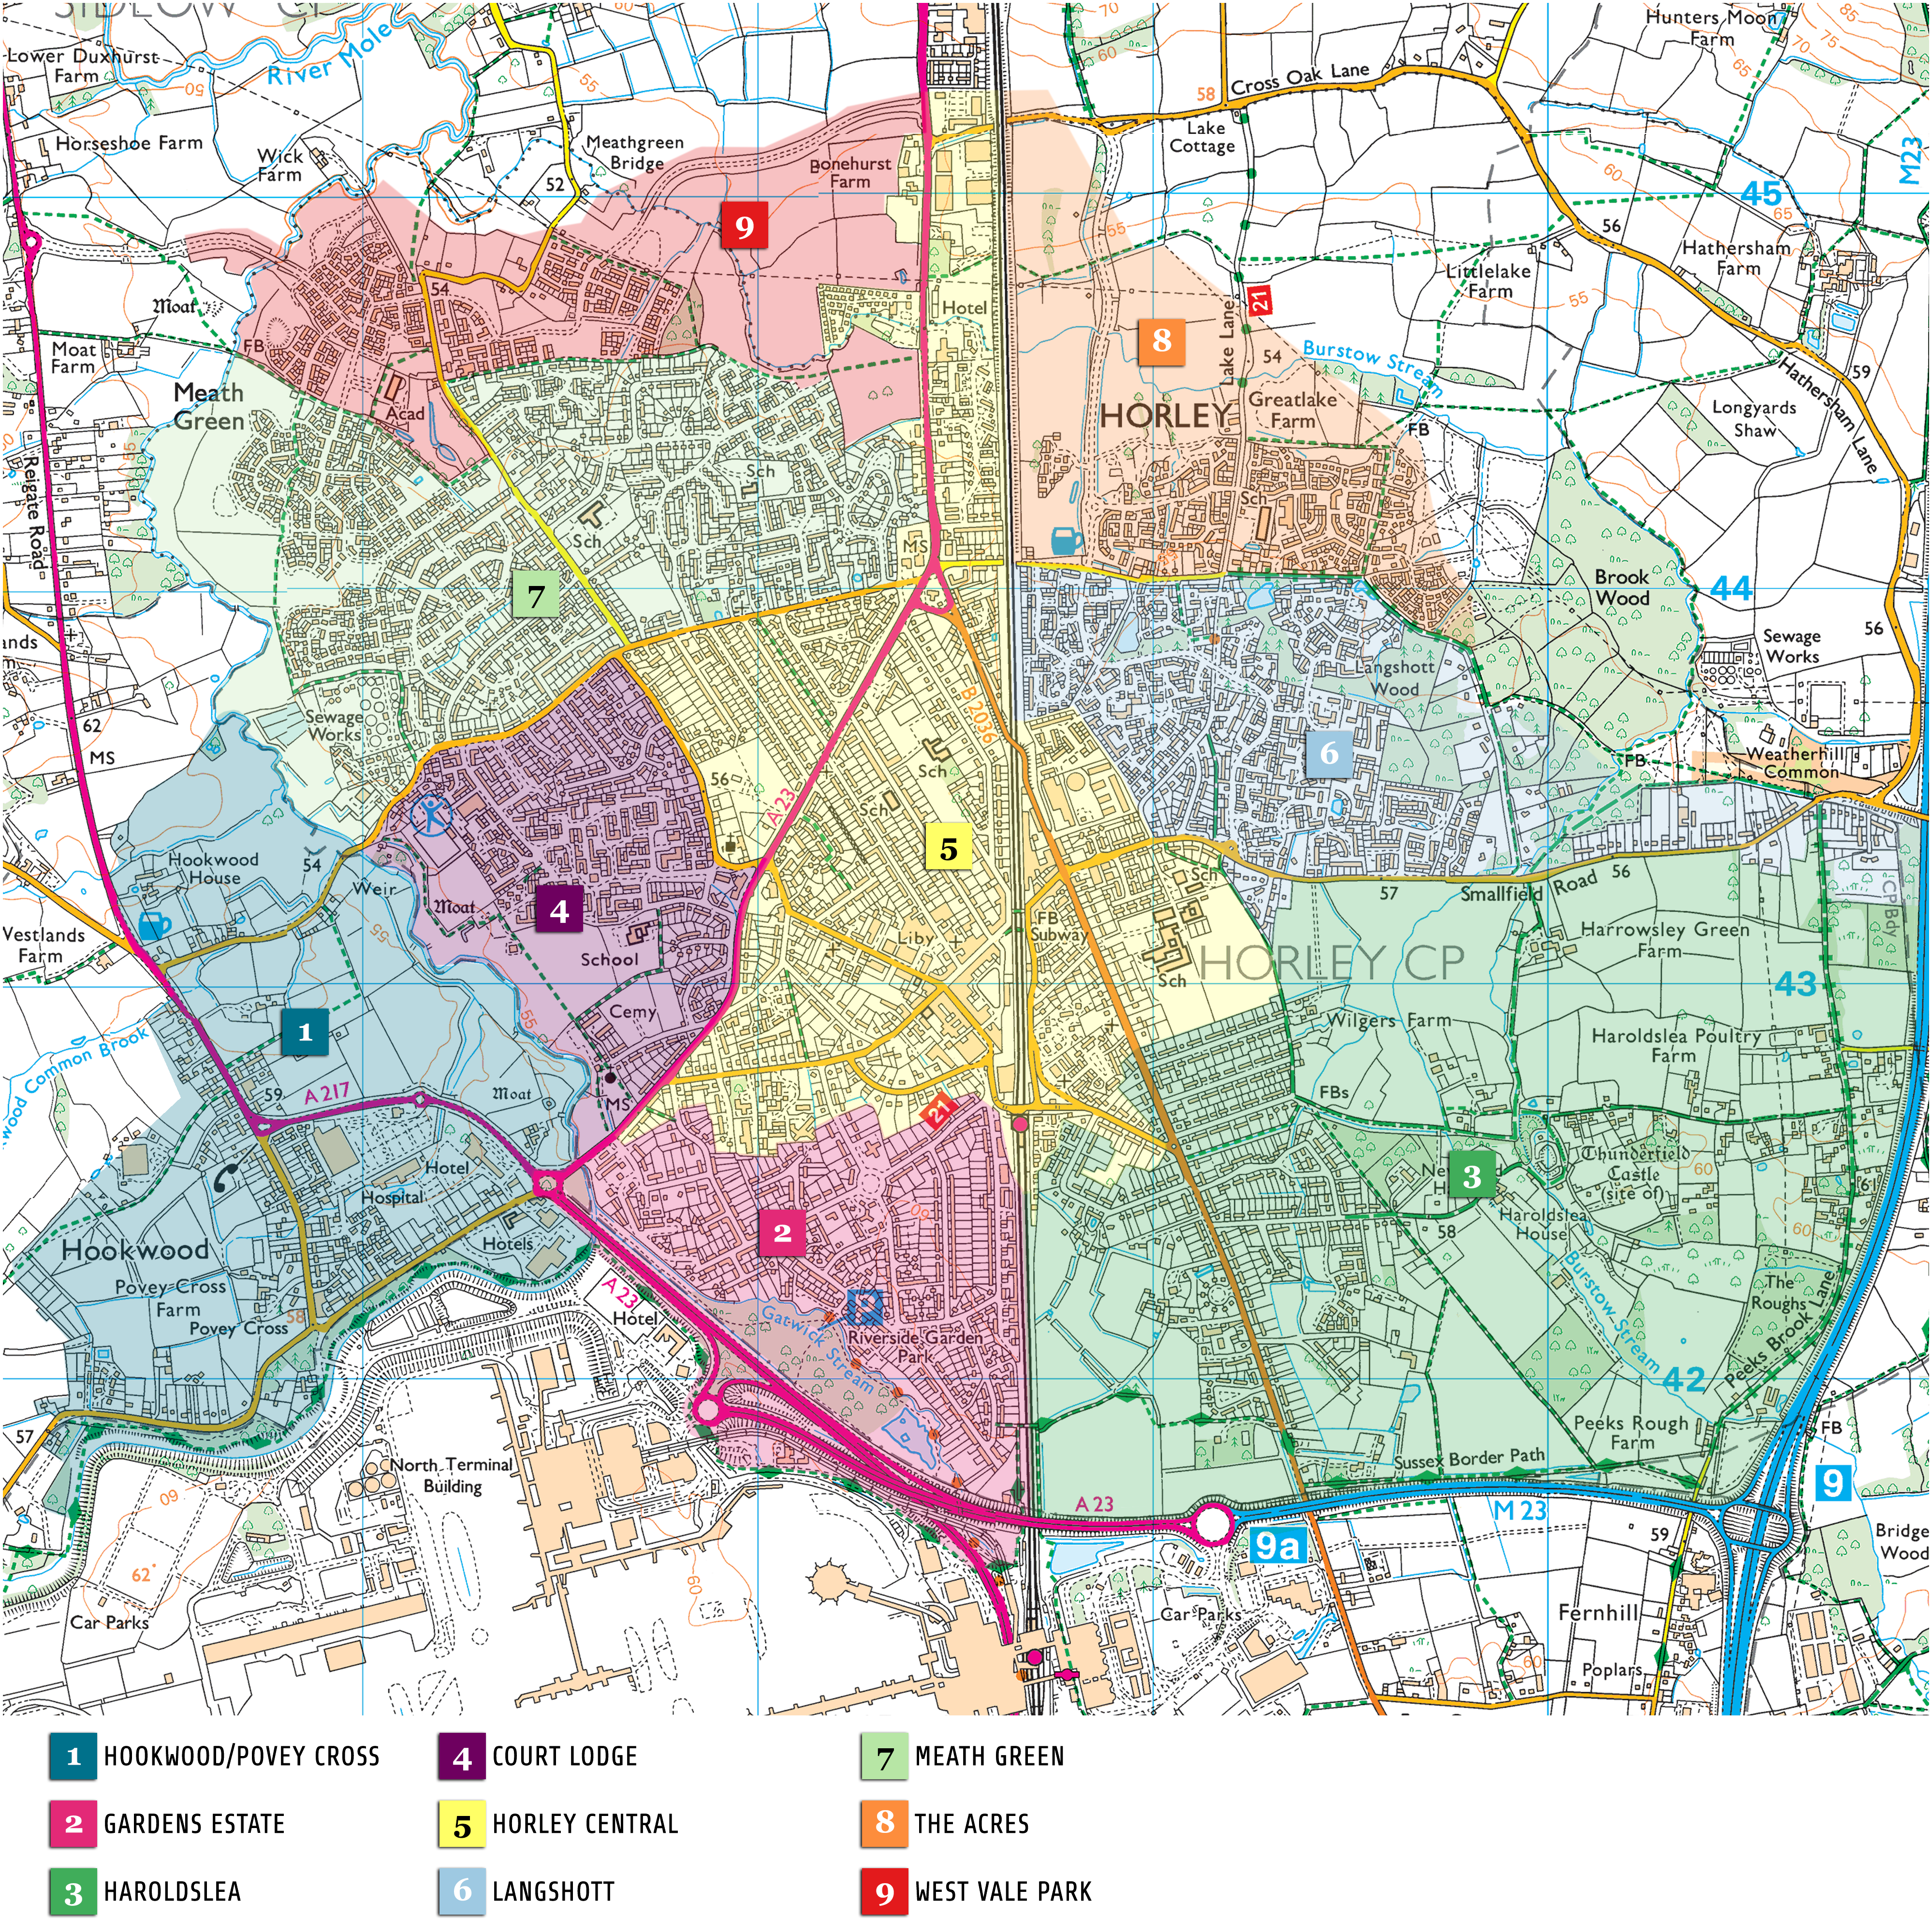
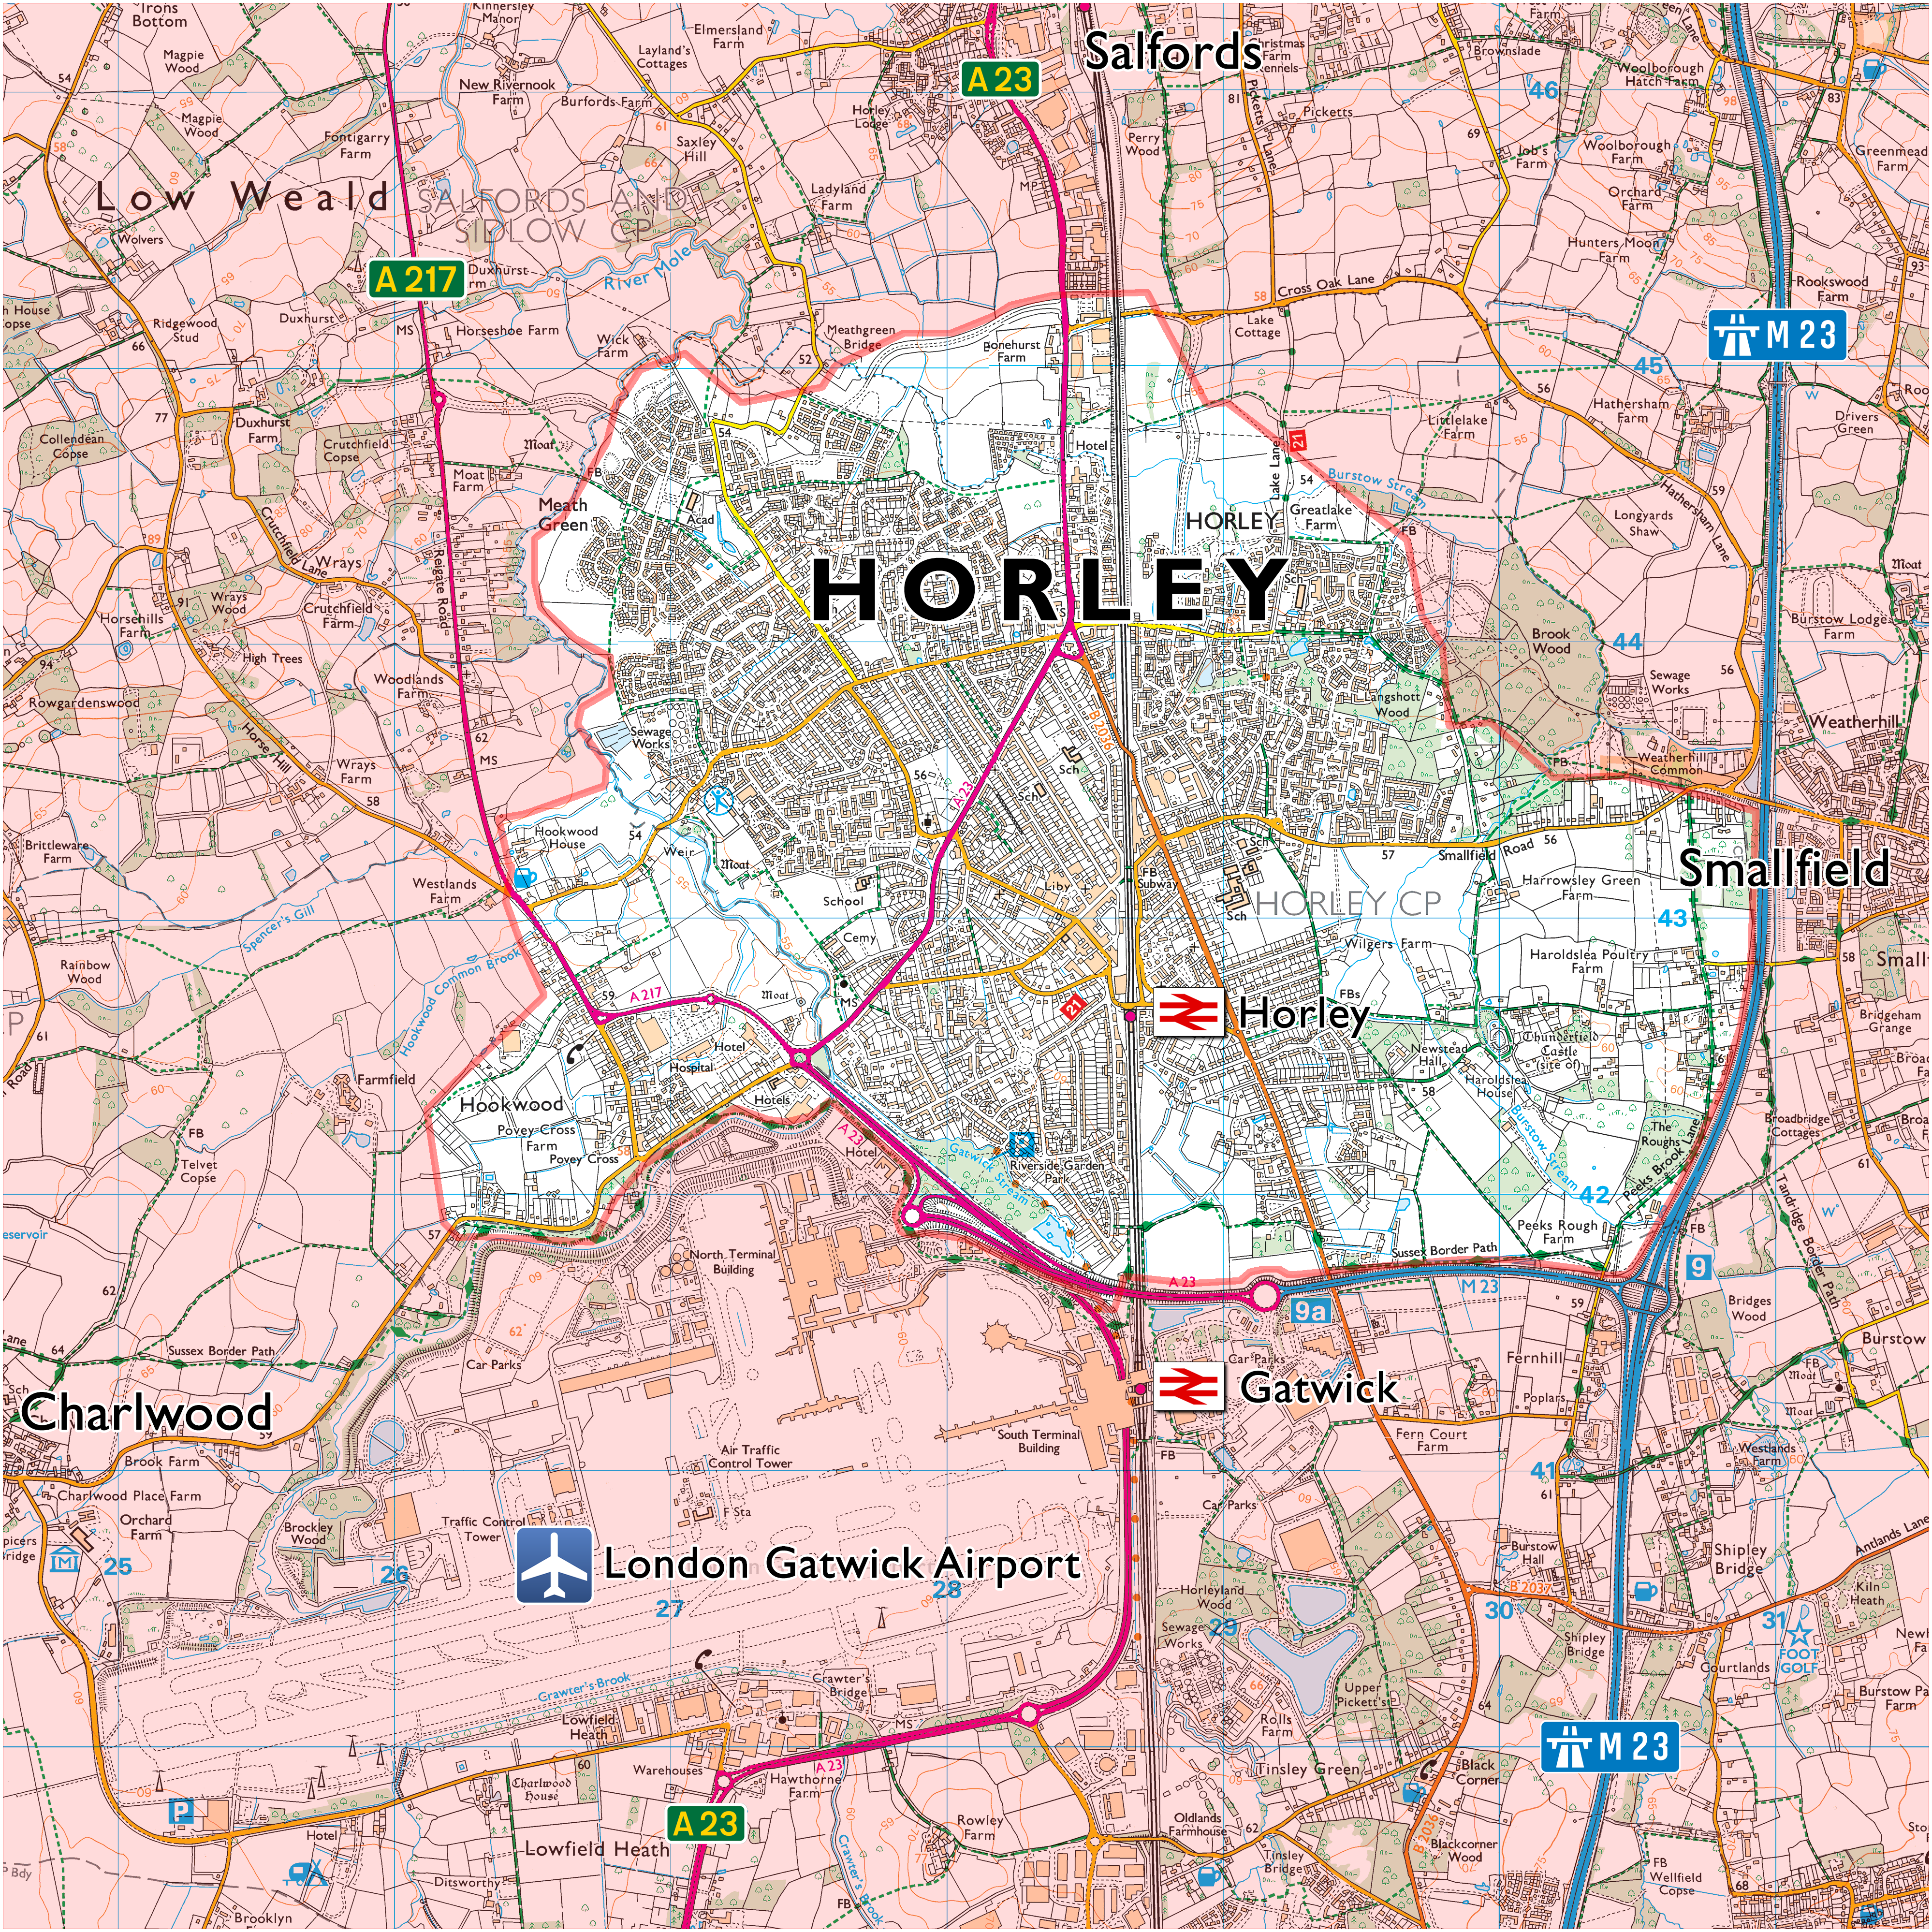
Horley by area
Although Horley does not have named-on-road-sign neighbourhoods—like Crawley does—the following areas are commonly referred to:
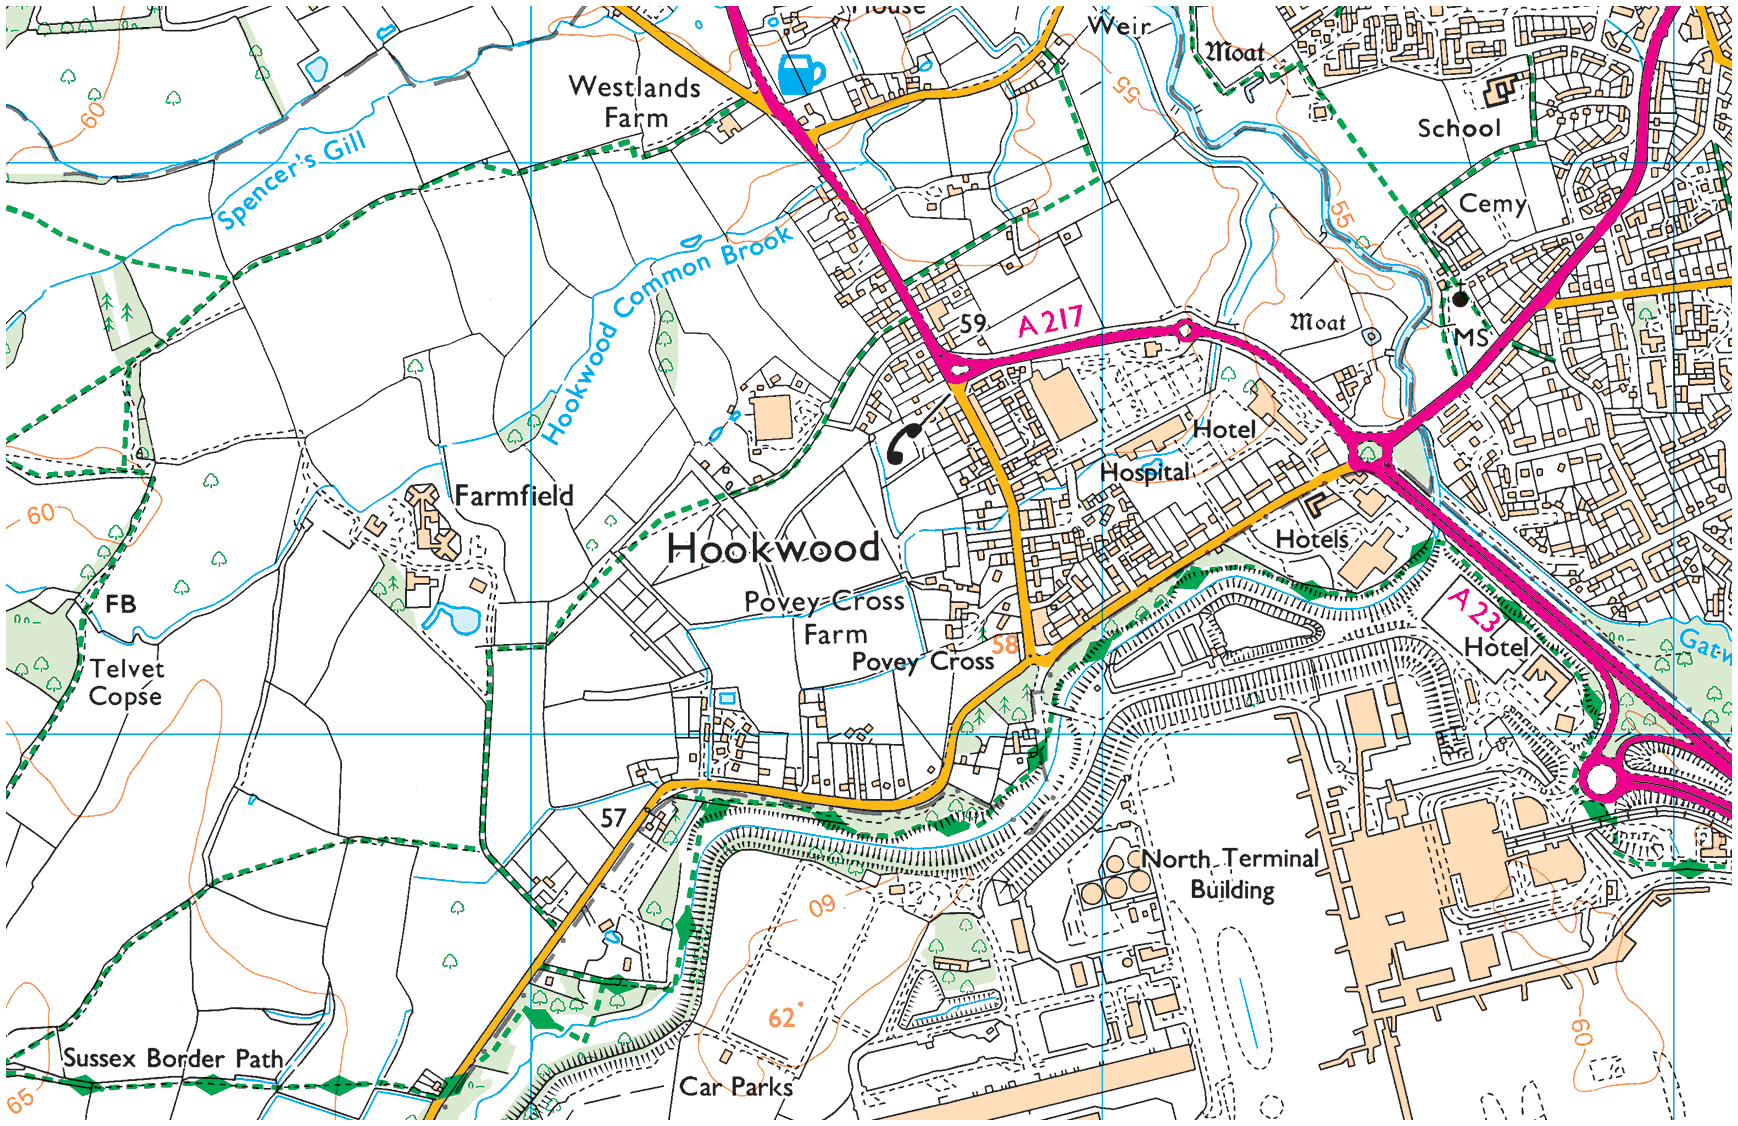
01. Hookwood/Povey Cross
Hookwood/Povey Cross →
Hookwood and Povey Cross are on the western outskirts of Horley. Many international hotels are situated here as is Tesco Hookwood. Several large housing developments are planned here. Hookwood and Povey Cross are directly beside the airport.
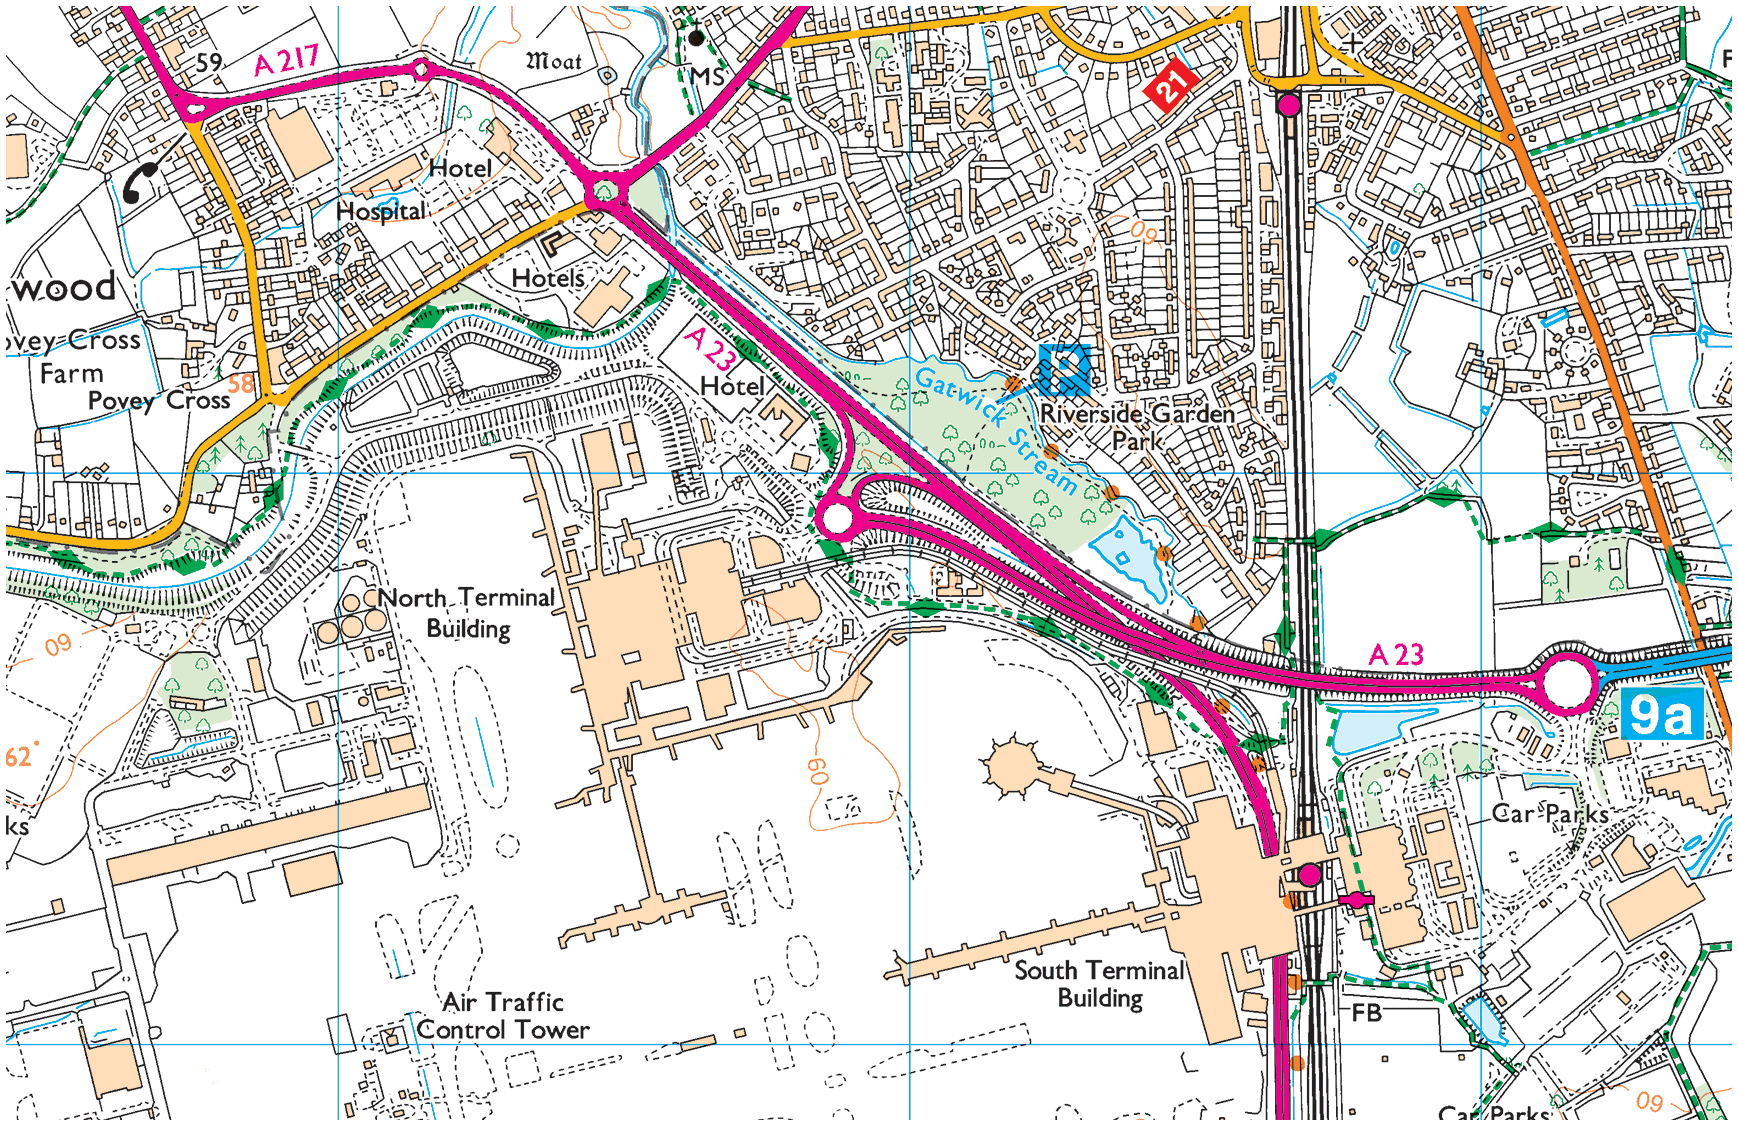
02. Gardens Estate
Gardens Estate →
Gardens Estate is very close to Gatwick airport and those working at LGW can easily access the terminal building via footpaths from the recreational area, Riverside Garden Park via the underpass of Gatwick airport station.
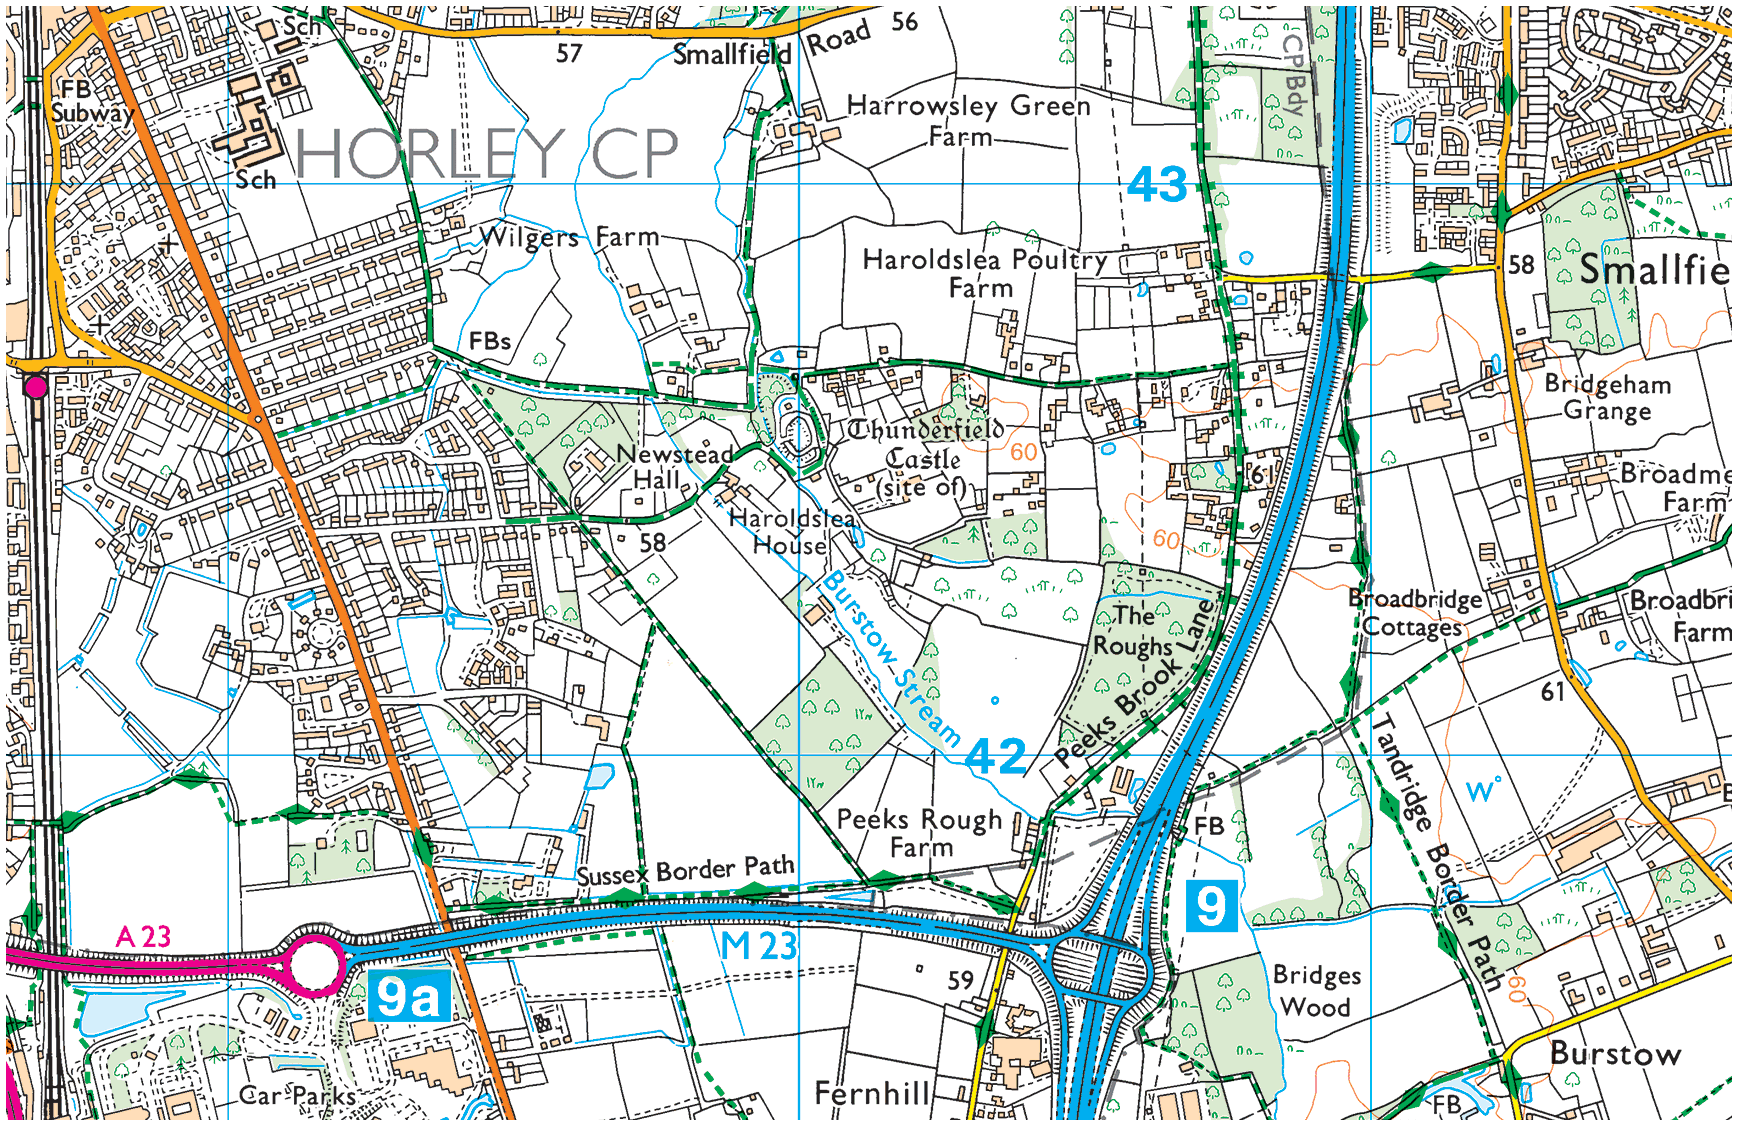
03. Haroldslea
Haroldslea →
This area comprises: The Balcombe Road (B2036) and the roads leading from it between Oakwood School and the A23/M23 link road flyover. For example, Limes Avenue which was originally laid out in 1936 and still retains some of the Lime trees planted at that time.
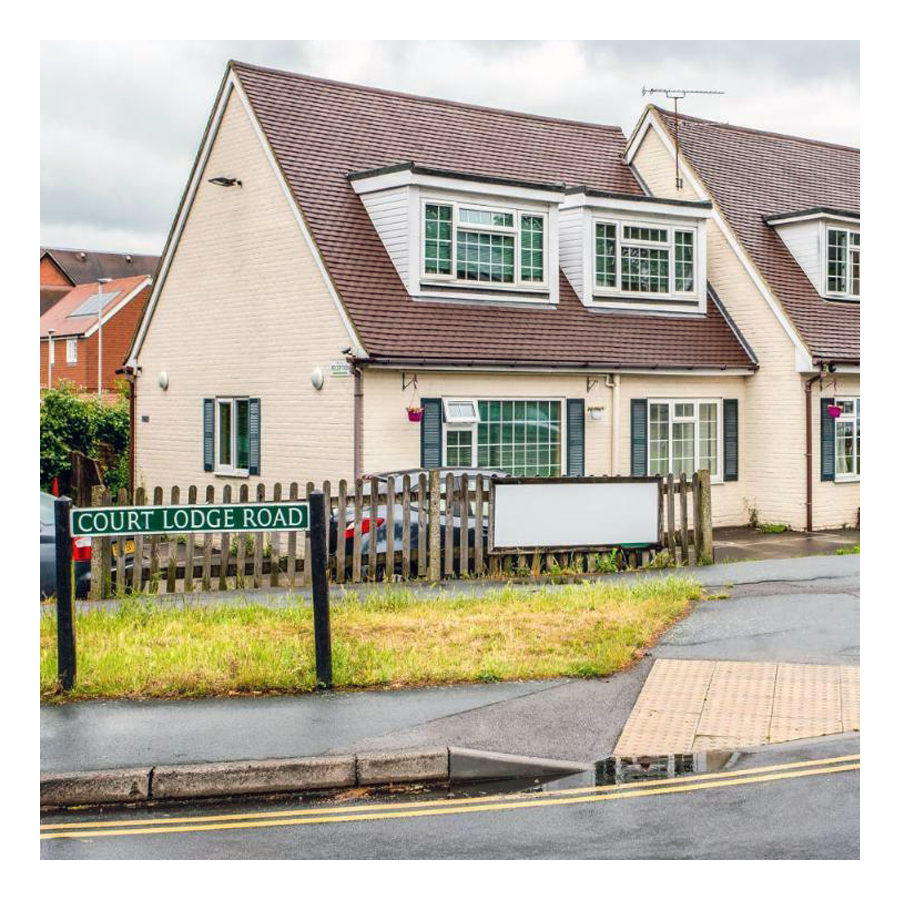
04. Court Lodge
Court Lodge →
This neighbourhood was set out in the 1950s and 1960s. It has a mixture of flats and houses. It is home to Horley leisure centre, several airport hotels and a couple of places of worship.
05. Horley Central
Horley Central →
This area includes the town centre which has quite a lot of purpose built residential flats and roads such as Church Road, Massetts Road, Pine Gardens, Ringley Avenue and, Russells Crescent.
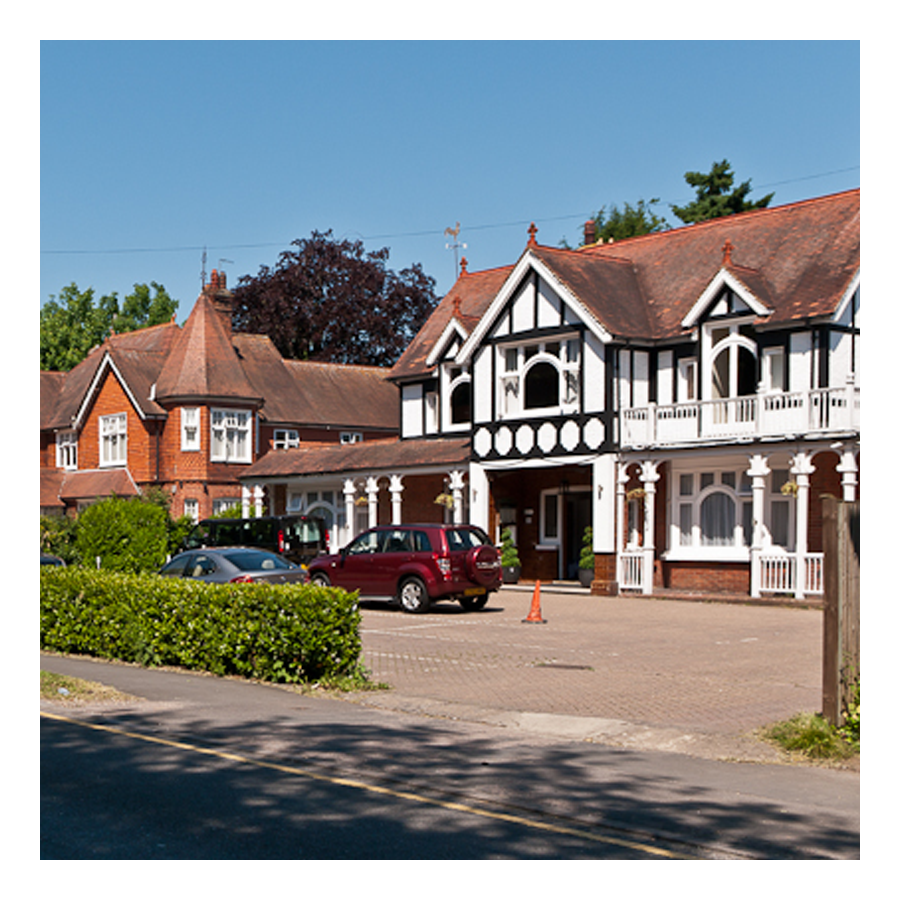
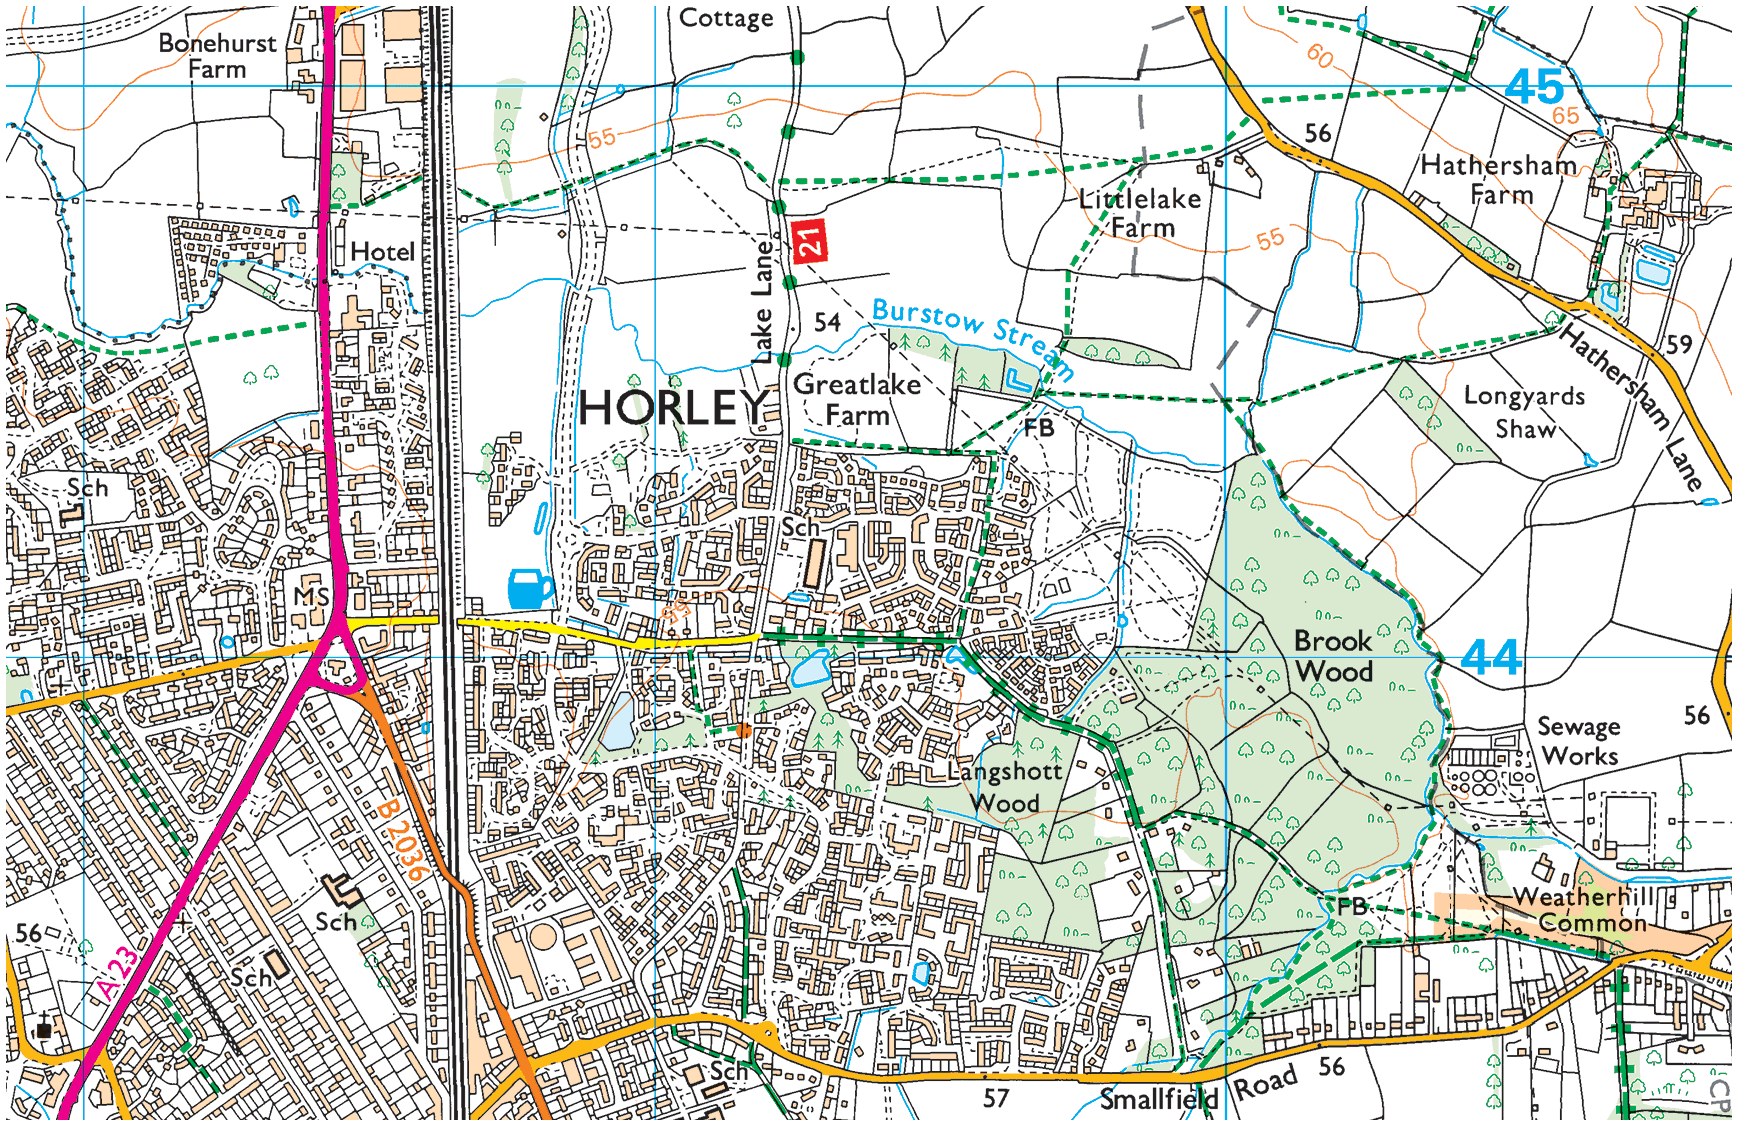
06. Langshott
Langshott →
This area of Horley stretches eastward towards Smallfield. Immediately to its north is the new estate called The Acres. This area is home to Langshott Manor, which was built in 1580; it is now a luxury hotel.
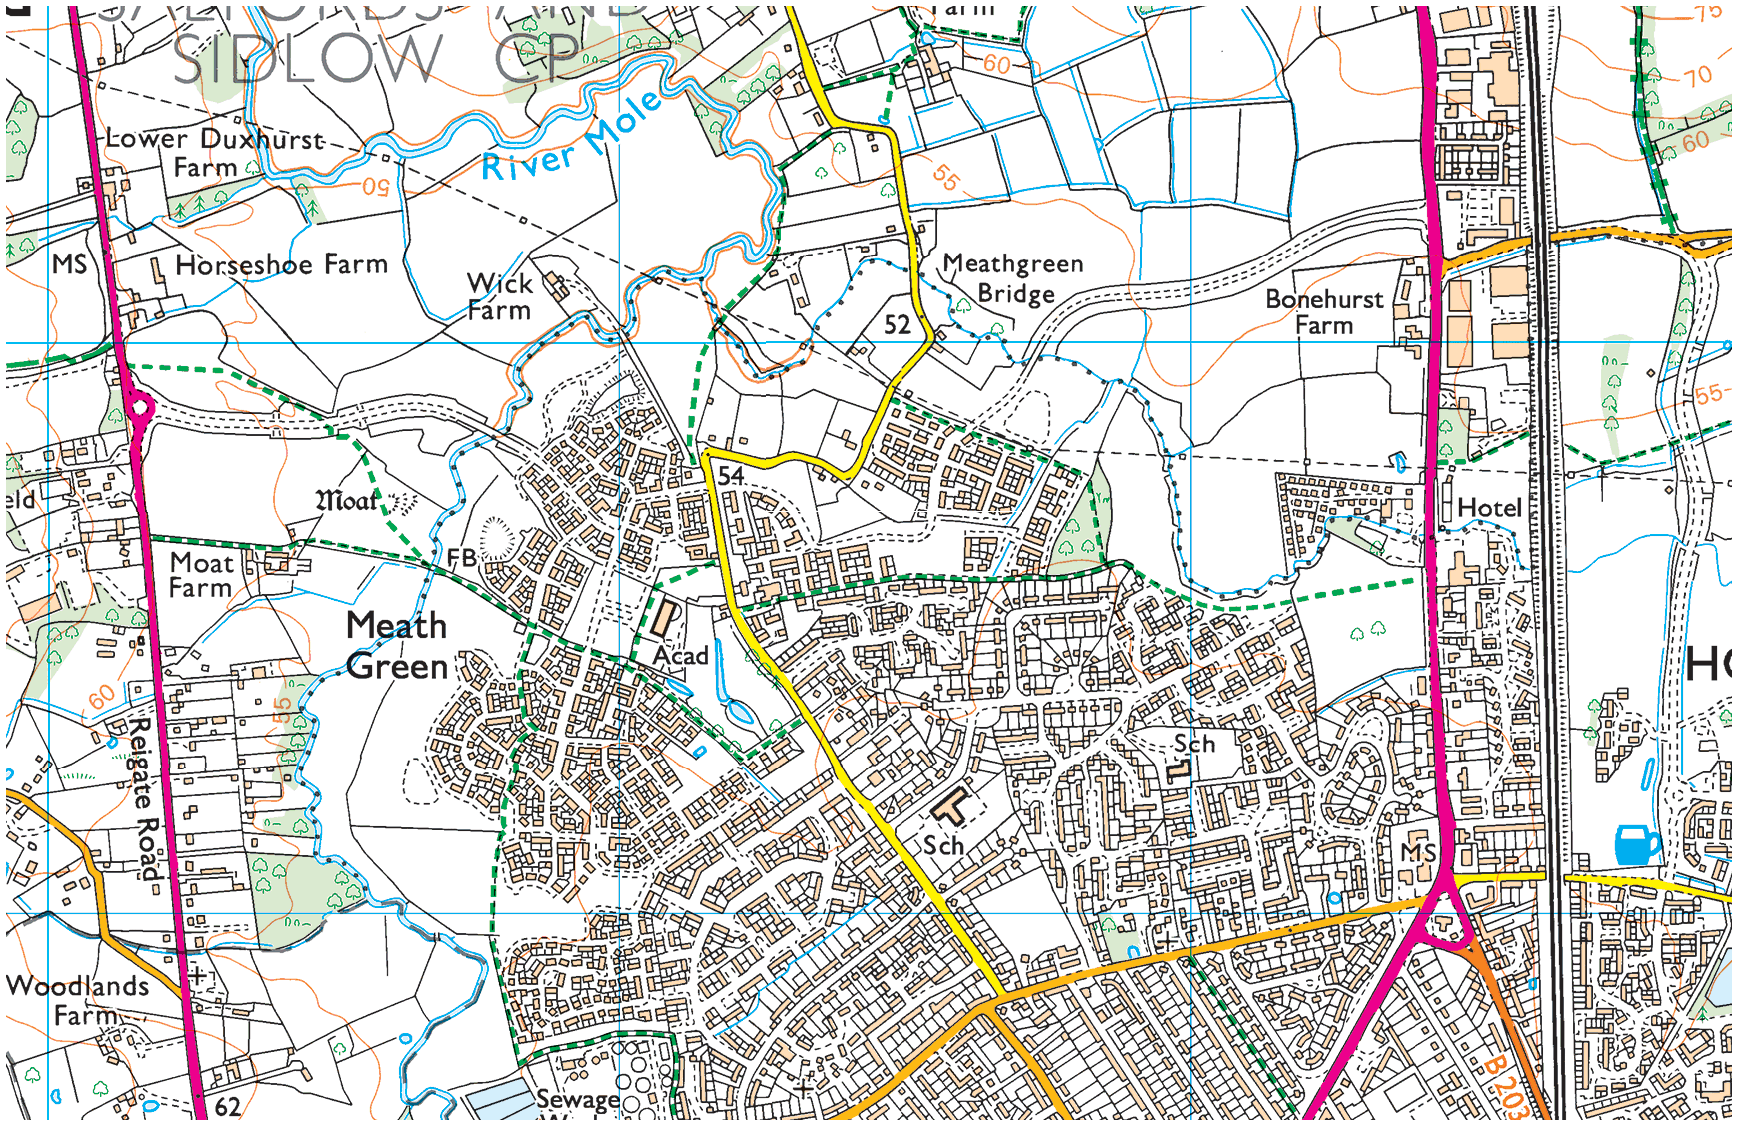
07. Meath Green
Meath Green →
Once upon a time this area was called Moy Grene, and it has some of Horley’s oldest homes. Today, the vast majority of the homes in this area where built from the late 1950s onwards.
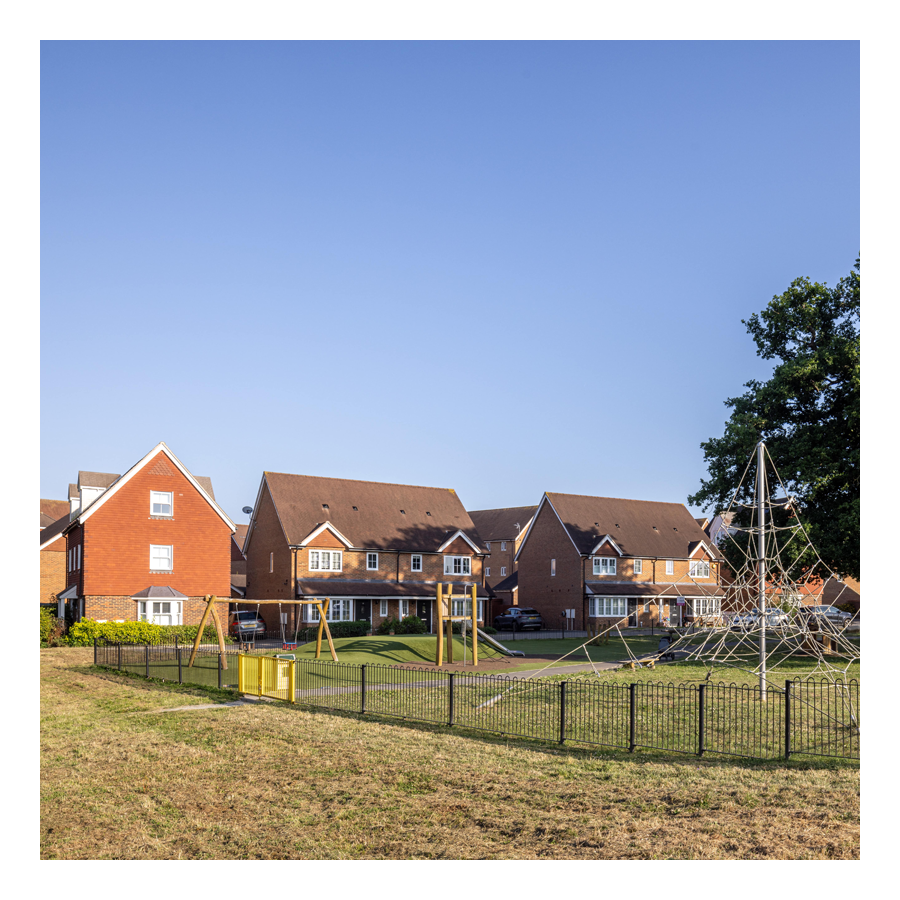
08. The Acres
The Acres →
This new neighbourhood of over 700 homes is in the north east of Horley and Langshott. The development was built mostly by Barratt and Bovis Homes between 2010 and 2016.
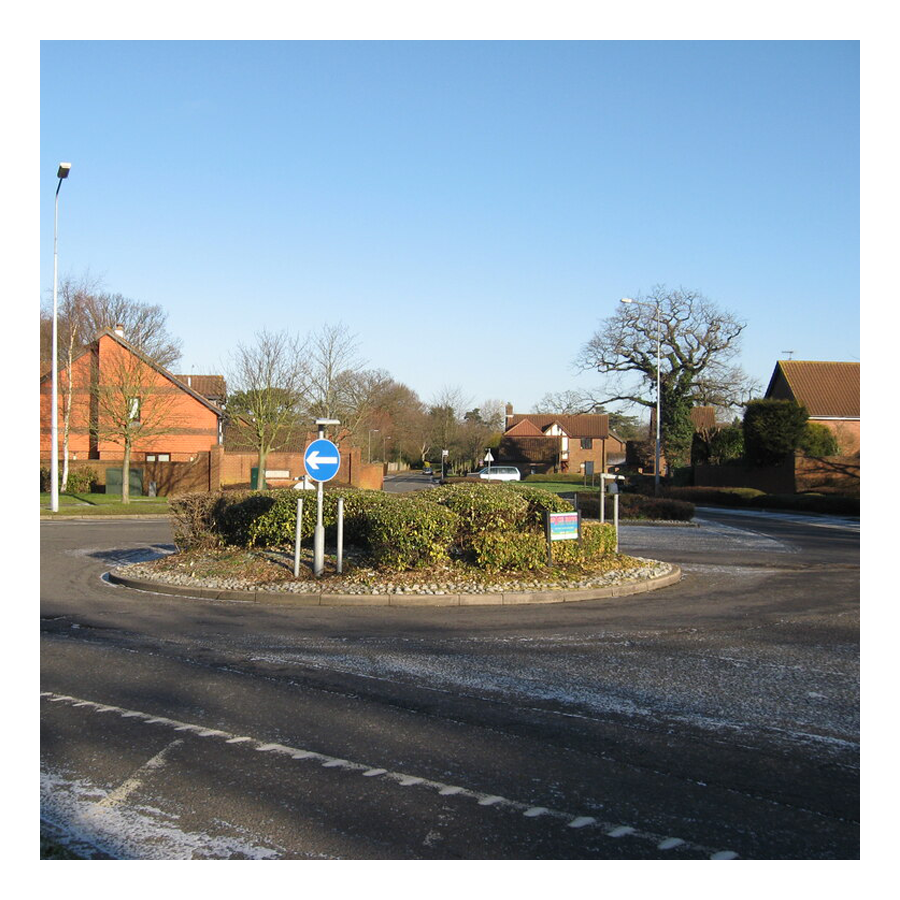
09. West Vale Park
West Vale Park →
This new neighbourhood is to the north west of Horley and joins onto Meath Green. To date, around 1,600 new homes have been constructed:
• Crest Nicholson brochure →
• Fabrica brochure →
• Taylor Wimpey brochure →
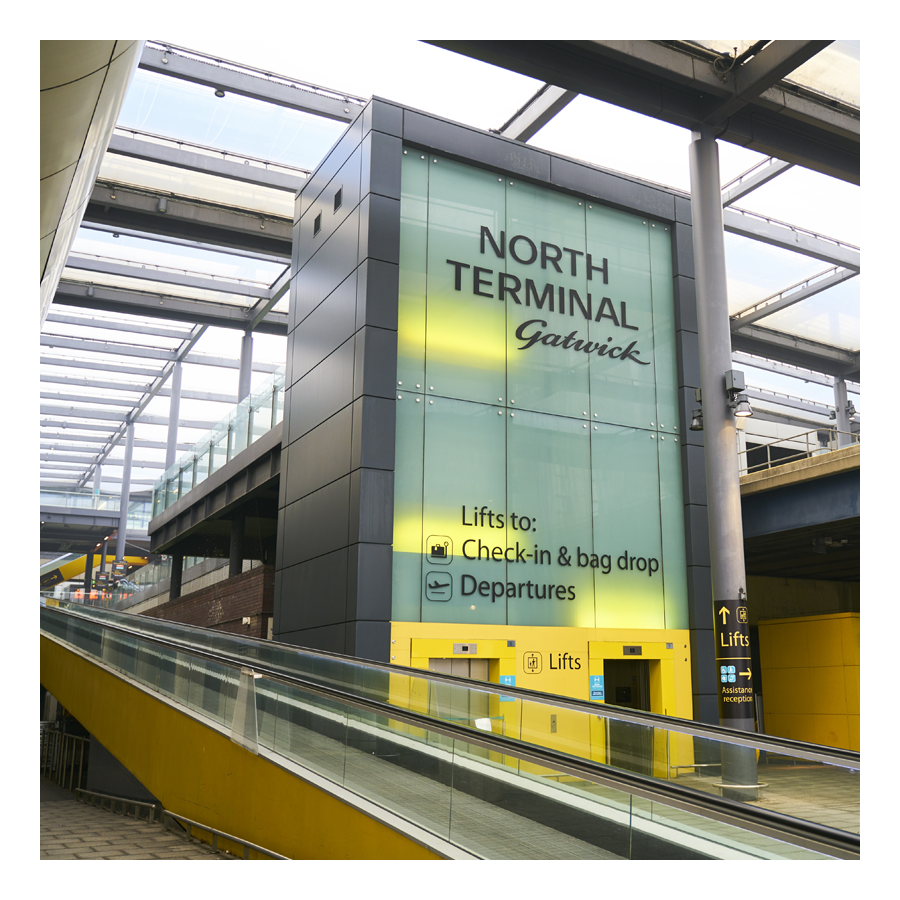
10. Gatwick
Explore Gatwick→
Gatwick airport is included as an area of Horley because historically it was part of Horley and, it remains adjacent to this day. Gatwick, before becoming a major international airport, was a famous horse racetrack which hosted the Grand National on several occasions.
Horley neighbourhoods
Horley Town

01. Hookwood/Povey Cross
02. Gardens Estate
03. Haroldslea
04. Court Lodge
05. Horley Central
06. Langshott
07. Meath Green
08. The Acres
09. West Vale Park
10. Gatwick